Configuring Keycloak Identity provider

If your organization uses Keycloak Identity Provider (IdP) for user authentication, you can configure SAML Service provider to allow your users to log in to your ConcreteCMS website using their IdP Keycloak credentials.
Configuration for SAML must be done in two places: at the IdP (Keycloak) and at the SP (Our SAML Service provider package) .In the next sub-chapters, we'll provide guidelines for a basic configuration of Keycloak IdP and how to set up it as your identity provider .
Prerequisite : You must have an Install Keyloak server in your Host and run it .
These steps reflect a third-party application and are subject to change without our knowledge. If the steps described here do not match the screens you see in your IdP account, you can use the general SAML configuration steps, along with the Keyloak IdP’s documentation (https://www.keycloak.org/documentation ) .
1) Add our Service provider informations to Keycloak
The next step enables you to retrieve the information Keycloak needs to work with our SAML Service provider .
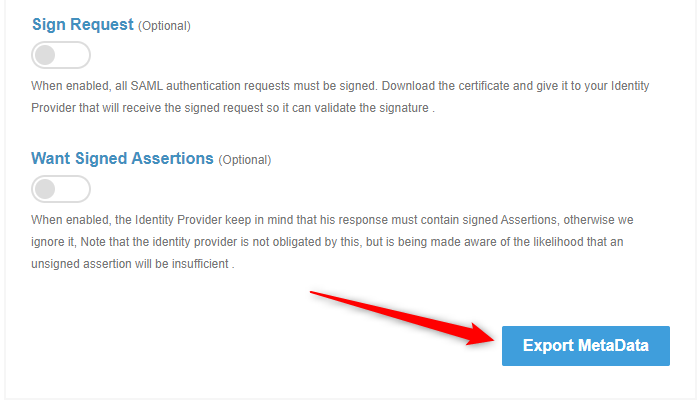
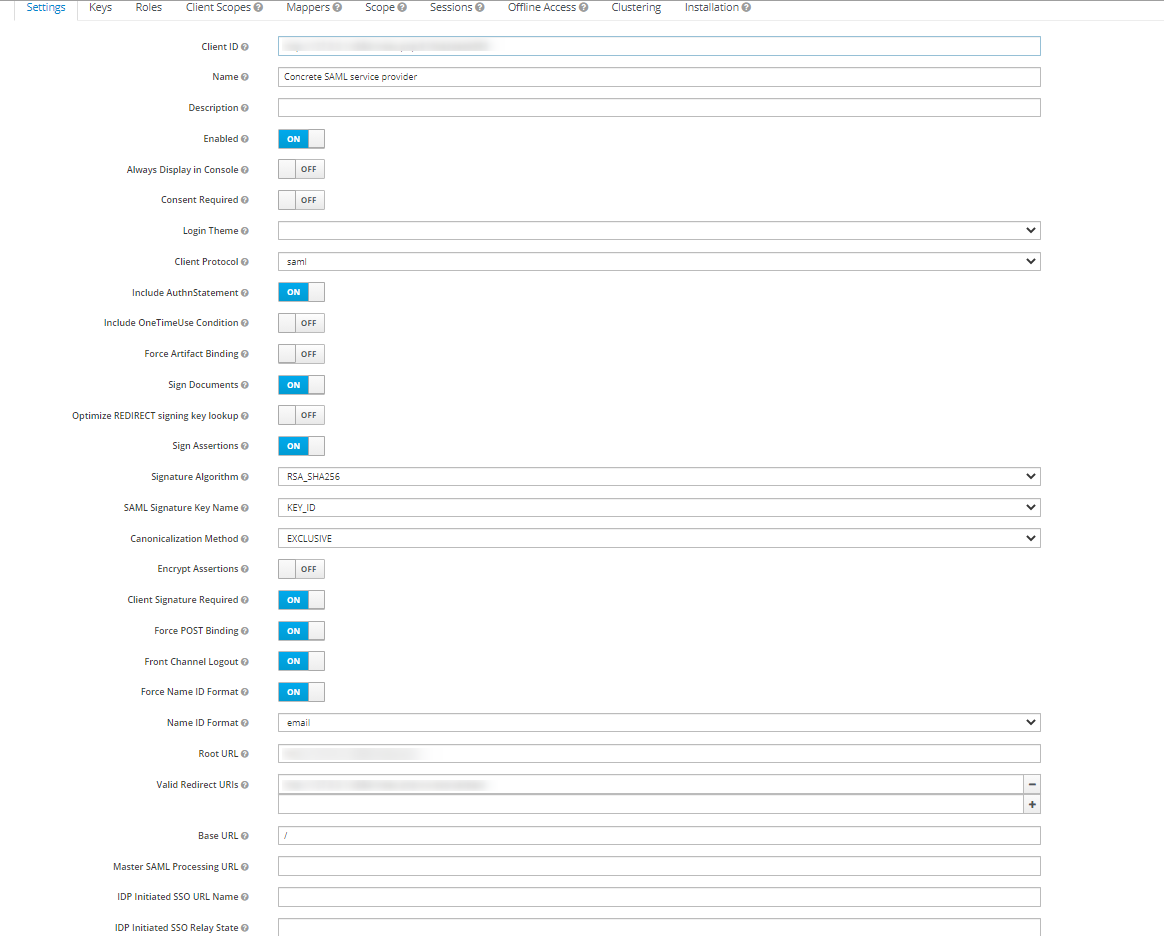
Go to " Dashboard > SAML Service Provider > Configuration and Settings " page in our package .
Click Export Metadata button in the bottom of SAML Info section to download an XML file of your SAML configuration settings to send to Keycloak Identity provider.
2) Setup Keycloak IdP
Follow the steps below to configure Keyclock as an Identity Provider
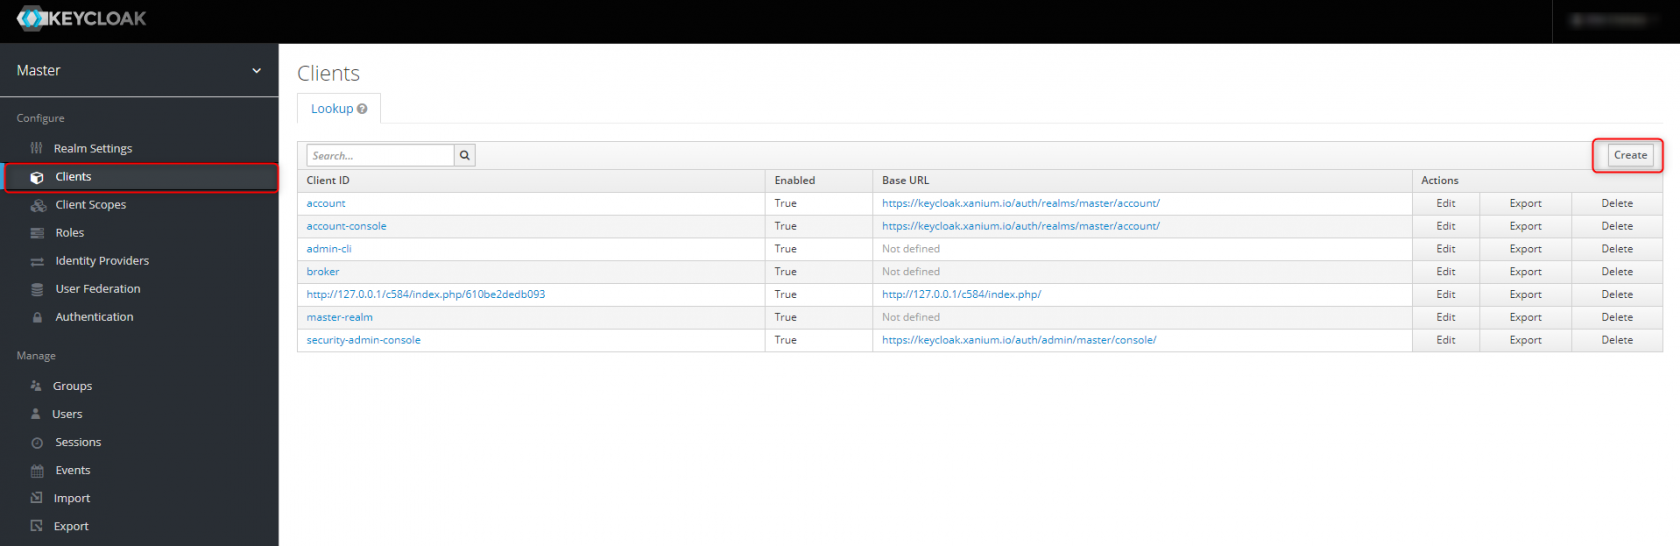
Go to your Keycloak Admin console, select the realm that you want to use.
Select Clients in the right menu and select Create
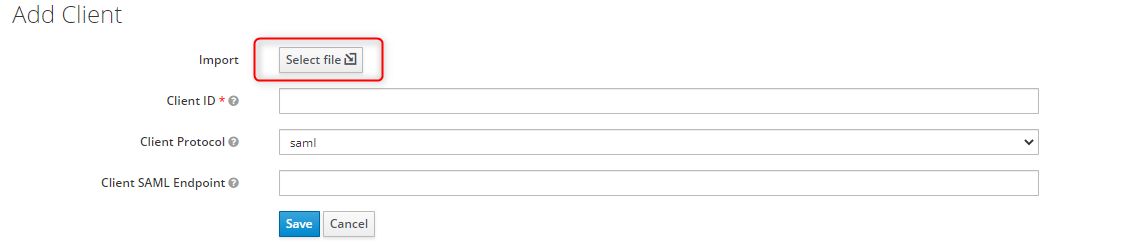
Use Select file to open the xml file you've saved earlier. (Step 1)
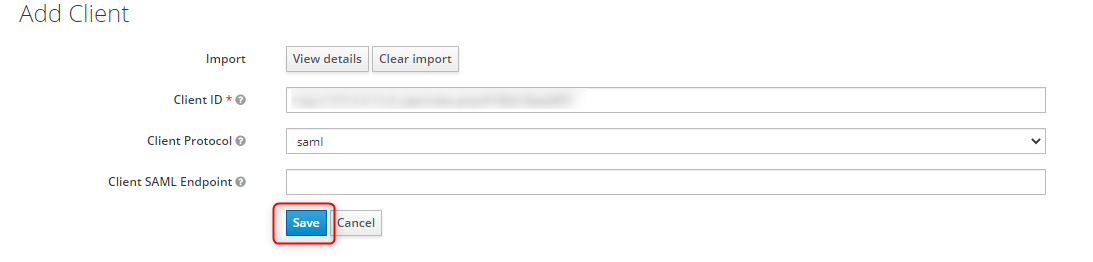
Once imported, Save your settings.
You'll see the following screen, leave its settings untouched unless you know what to configure beyond standard configuration.
3) Add Keycloak IdP informations Into our SAML Service provider
and Save XML File from that link .
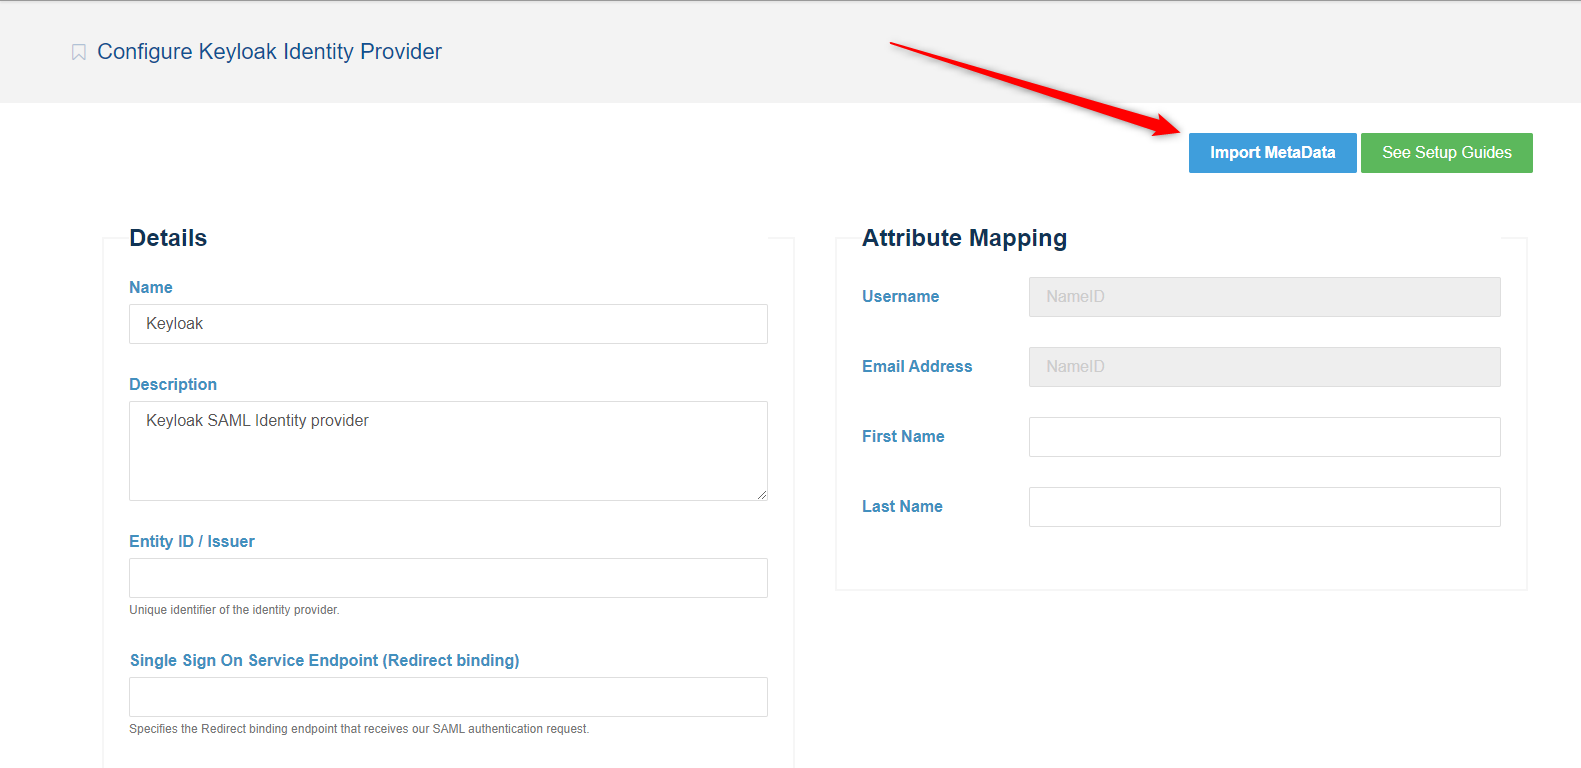
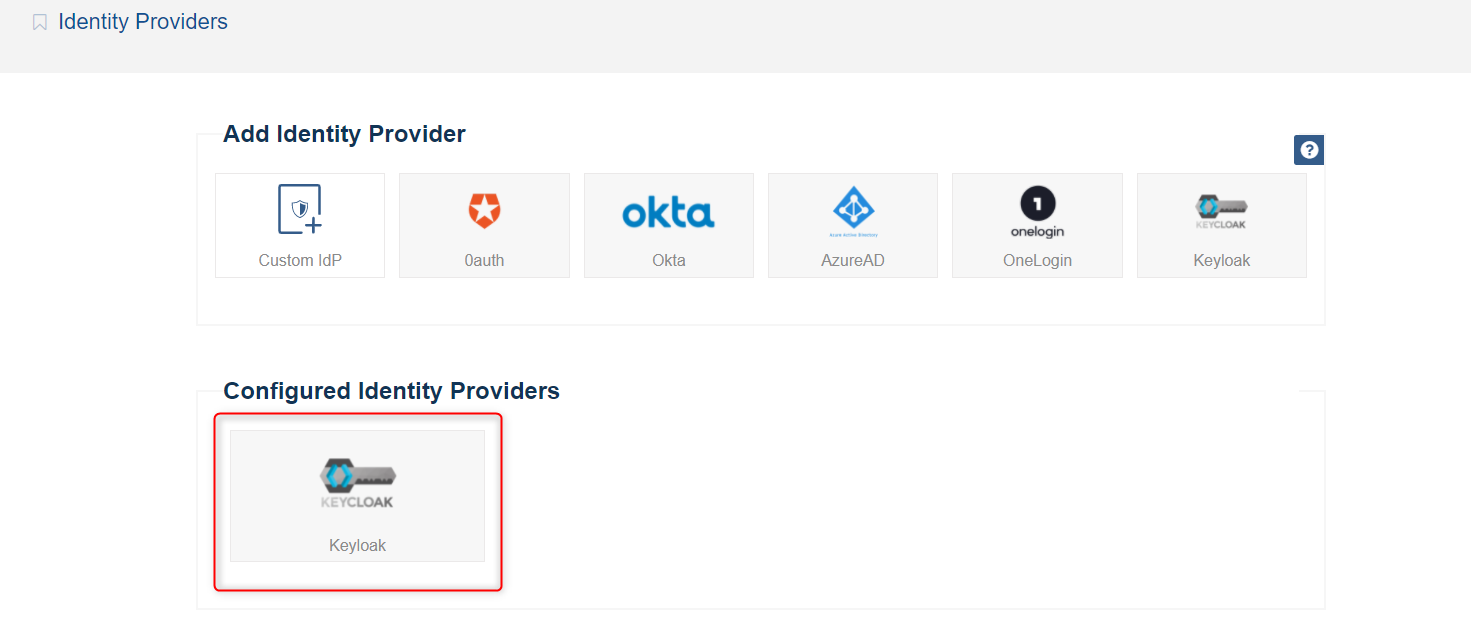
Go back to our SAML Service provider package and go to " Dashboard > SAML Service Provider > Identity providers " page .
and select Keycloak Idp from list shown .

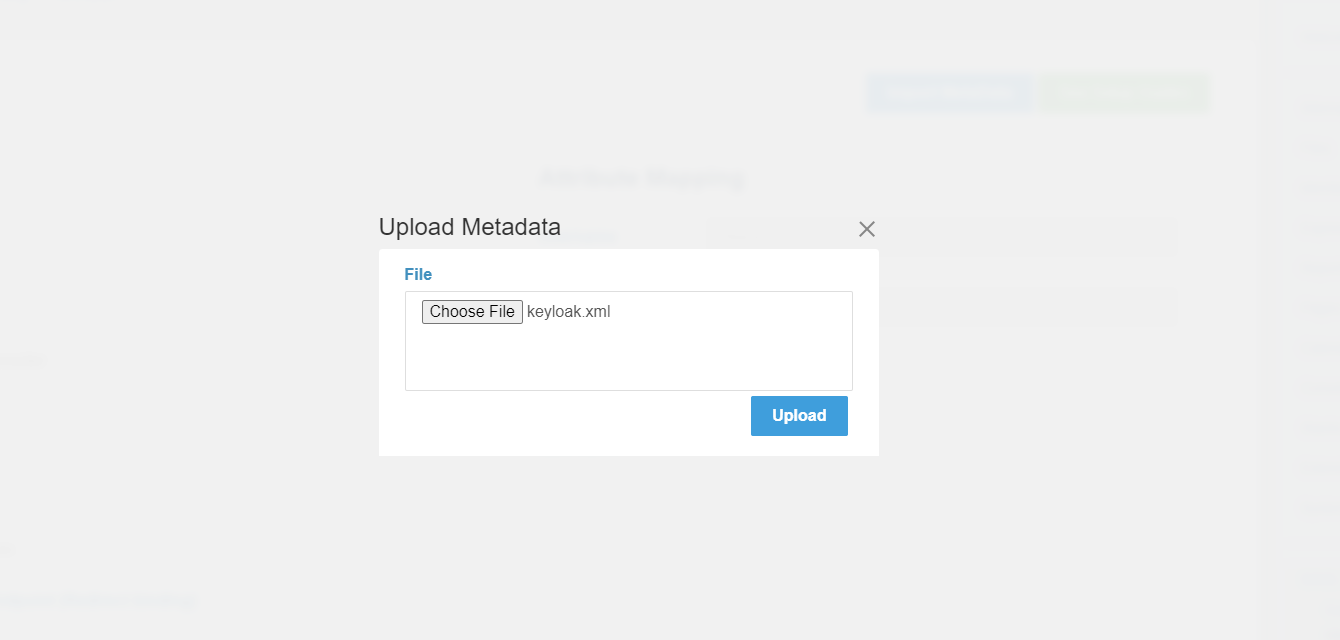
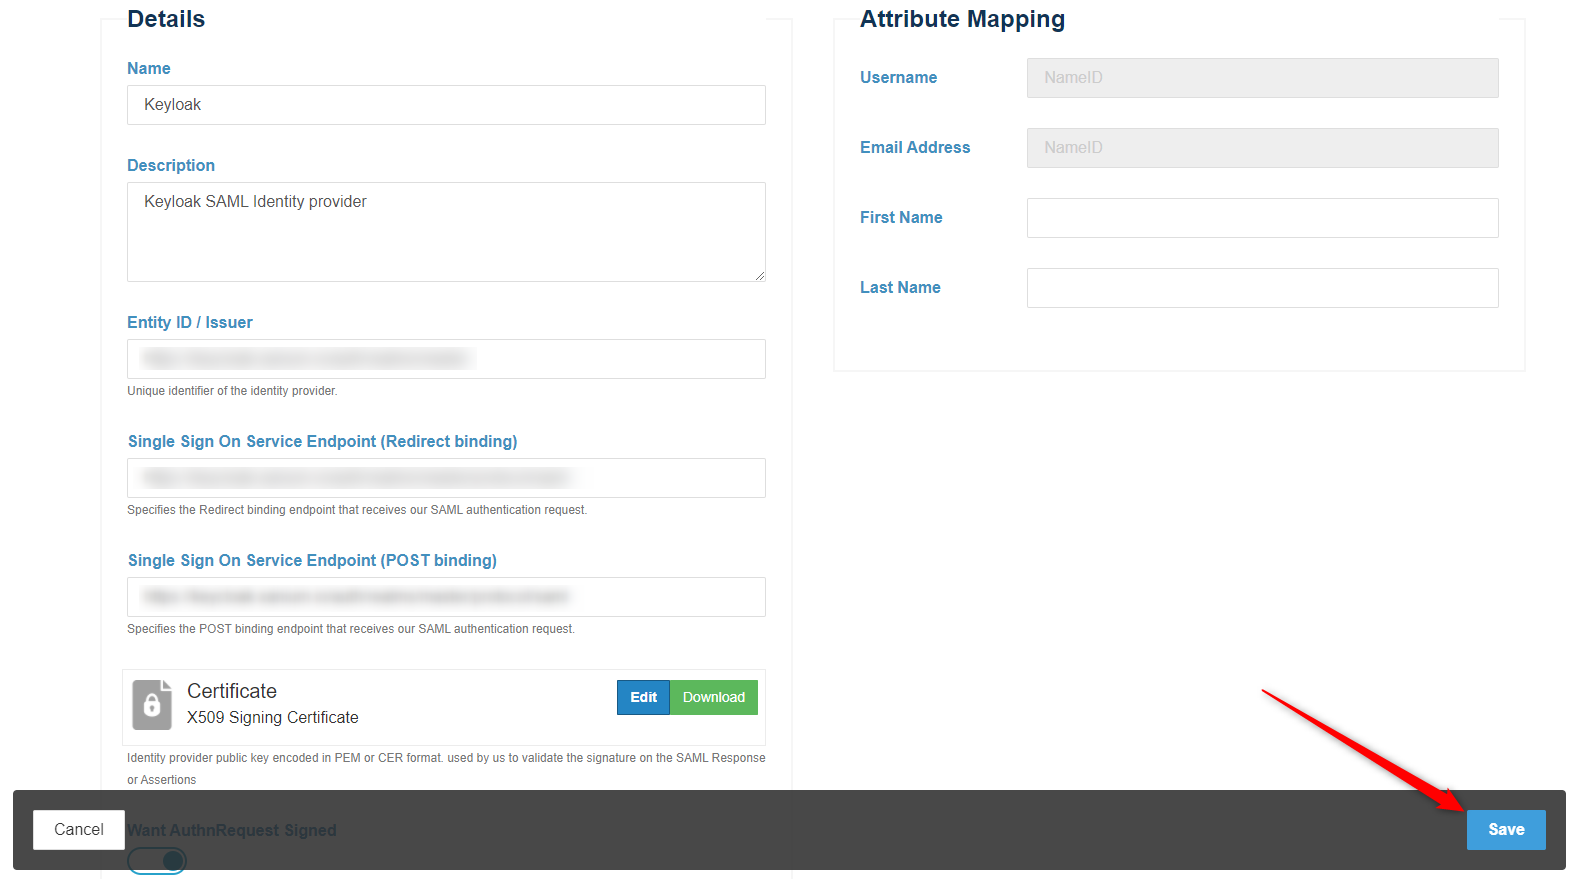
The last file contains all the information requested in following sections. If you have this file, you can click in Import Metadata button . And you can now upload it . Select that file and click in Upload button, and the system will parse it to populate the required fields in following sections.
Click on Save
Your configured IdP will be shown in " Dashboard > SAML Service Provider > Identity providers " page .
And at this point, you have successfully configured Keycloak as an Identity provider in the system .
If you have some wrong inputs in previous step , you can edit your configured identity providers by clicking it.
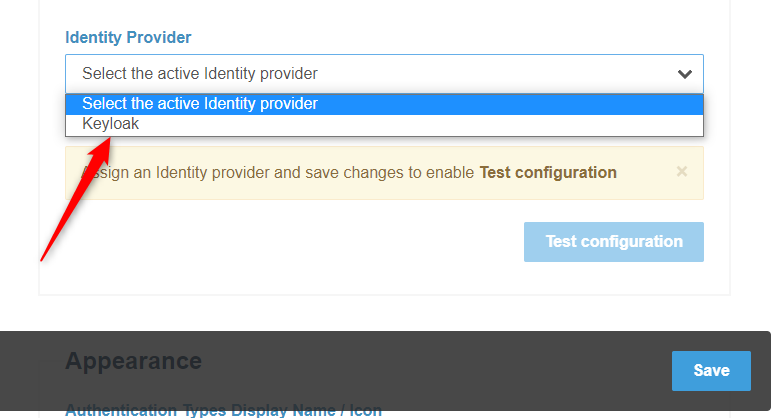
Go to " Dashboard > SAML Service Provider > Configuration and Settings " page .
In Settings section, select your configured identity provider (from step above) appeared in the configured IdPs list .
Click on Save .
After successfully test your connection, you must check your settings in Settings and Appearance sections in the same page .
Activate the system to show your End Users the Login form .
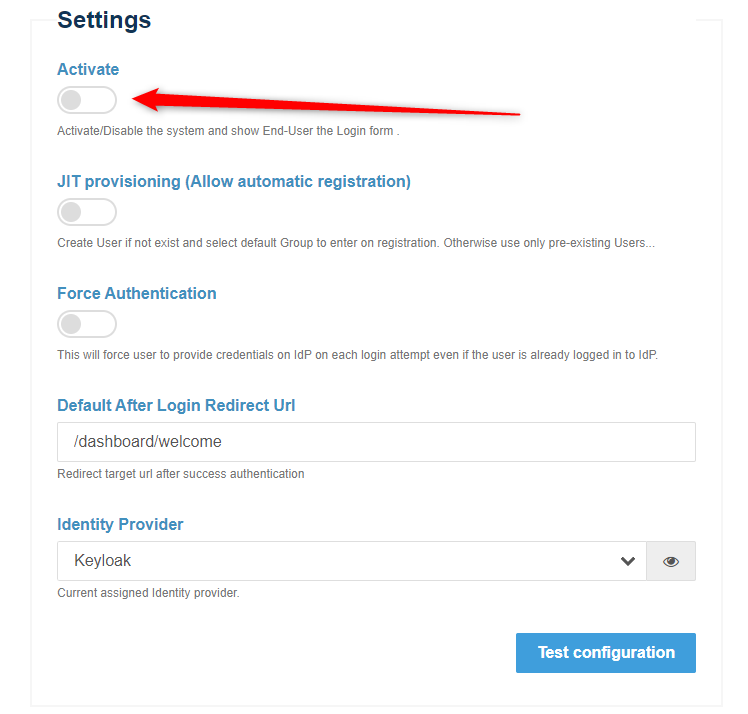
Click on Save .
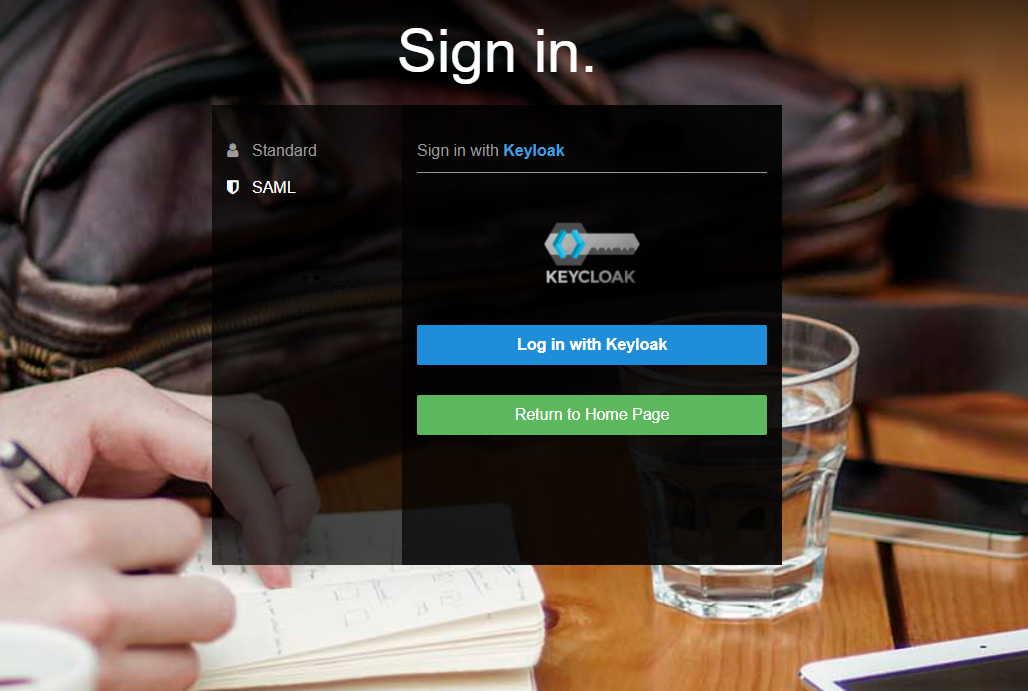
You should now be see a ‘SAML’ option in the ConcreteCMS login screen . This will redirect users to login to the keycloak instance for their username/password and will create a new ConcreteCMS user account with chosen group (If JIT provisioning is enabled) .
For a better understanding and more advanced configuration please check out the official Keycloak documentation. Also please refer to previous pages in this documentation.
If you are experiencing issues while testing the connection to the Keycloak server, first double-check the configuration options in SAML Service provider package and in Idp ( keycloak ) side . Also check Troubleshooting && FAQ page
Once you've completed the setup steps, it's important to test to make sure everything is working properly.
If you encounter any issues, check to make sure that the values in your IdP and your Service provider match .
You can also refer to the Troubleshooting section: see Troubleshooting.